If you want to uninstall the Windriver application from your computer system, then you have to go to the Control Panel. And there, look for the Windriver Tool application. After that, you need to right-click on the icon and, from the list of options, choose the Uninstall option. Now, the application will uninstall automatically after taking confirmation from you.

Update

Backup

Restore
How to Activate Windriver Tool on Windows 11
Follow the below steps to activate the Windriver tool service on your Windows/Mac device.
- Before jumping into the activation process, you need to install the Windriver application on your PC.
- Then, you have to launch any web browser.
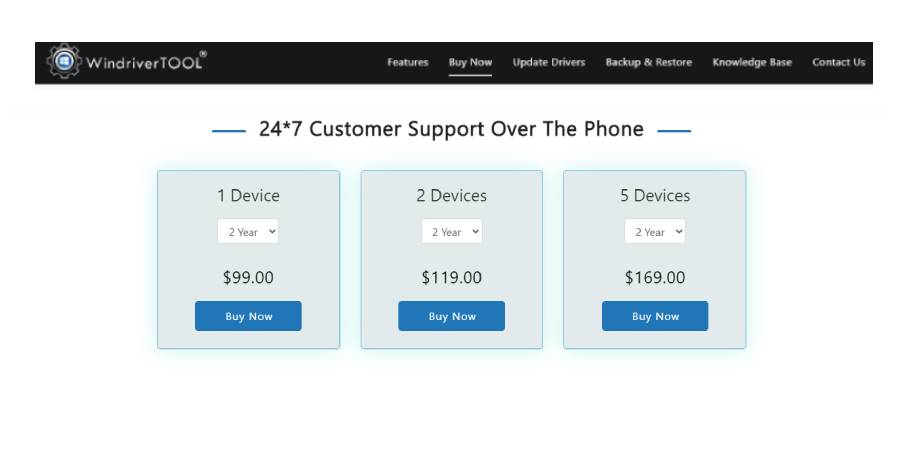
- Go to the Windriver Tool website (windrivertool.com) and tap on Buy Now.
- After that, you will see the three variations of its services: for 1 device, 2 devices, and 5 devices.
- Next, you have to click the Buy Now option for the service you want to activate on your device.
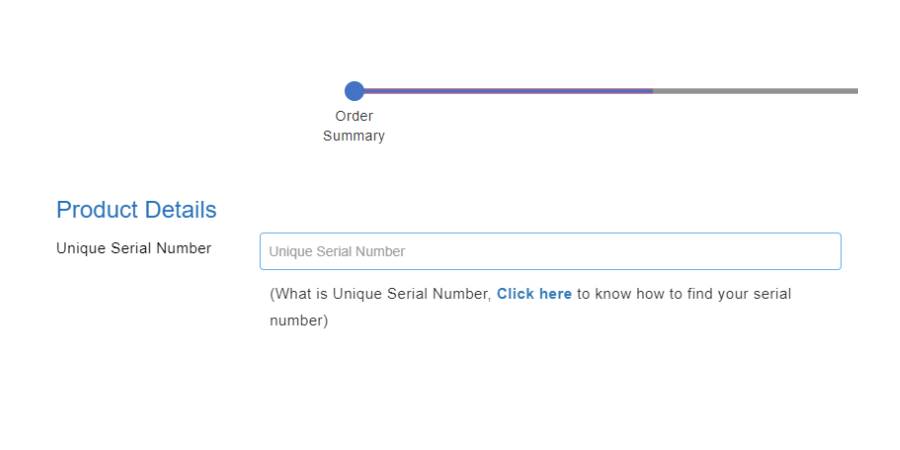
- Once you choose any of the options, it will take you to a new web page, where you have to enter the product's unique serial number. (The process to access unique serial numbers is explained in the further section.)
- After entering the unique serial number, go to the Contact Information section and fill in the necessary details.
- Once the contact information is filled in, you have to click on the Pay now option.
- After that, you can choose the payment method which seems suitable for you.
- Once you complete the payment process, you will receive the license key for activating the Windriver service.
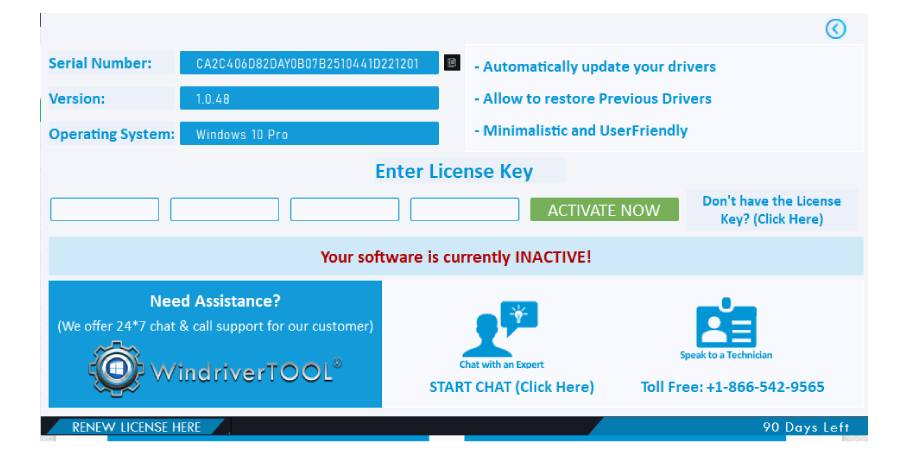
- Now, you have to open the Windrive application and click on the Renew Licence Here option.
- It will take you to the next page, where you will see the Enter Licence Key section.
- Then, enter the code and click on the Activate Now option.

How to Activate Windriver Tool on Windows 10
- First, download the Windriver Tool application on your device.
- Open a web browser and browse the windriver.com website.
- On the webpage, click on Buy now.
- On the next page, choose the plan you want to subscribe to.
- When you choose any plan, it will take you to the next page and ask for a Unique Serial Number.
- After filling in the unique serial number, move below and enter the Contact Information.
- Next, click on Pay Now.
- When the payment is done, you will get a code in your mail.
- Furthermore, open the Windriver Tool application and click on Renew Licence Here.
- Enter the code in the Enter Licence Key section on the next page.
- Click on the Activate Now option to finish the process.
How to Activate Windriver Tool on Windows 8
- Make sure you have the Windriver Tool application.
- Go to the Windriver Tool website on any web browser.
- Now, choose the Buy Now tab.
- Then, on the next page, select any plan you want to buy.
- Next, you need to enter the Unique Serial Number for your Windriver Tool application.
- Then, further fill your personal details in the Contact Information section.
- Afterward, click on the Pay Now option to receive the code to activate the service.
- Henceforth, open the Windriver Tool app and click on Renew Licence Here.
- On the next page, type the code next to the Enter Licence Key section.
- Lastly, select the Activate Now option.
How to Activate Windriver Tool on Windows 7
- First, ensure that you have already installed the Windriver Tool application.
- Browse the Windriver tool website and move to the Buy Now tab.
- After that, pick any suitable plan and click on Buy Now.
- When the next page opens, type the Unique Serial Number of your Windriver Tool application.
- Next, fill up the Contact Information in the below section of the same page.
- Then select the Pay Now option to complete the payment.
- Now you received the code for product activation.
- Furthermore, open your Windriver application and choose Renew Licence Here.
- And then, enter the code (you receive it earlier) in the Enter Licence Key section.
- Finally, click on the Activate Now option.
How to Know the Product's Unique Serial Number of the Windriver Application?
Below is the guide to see the product serial number of the Windriver application.
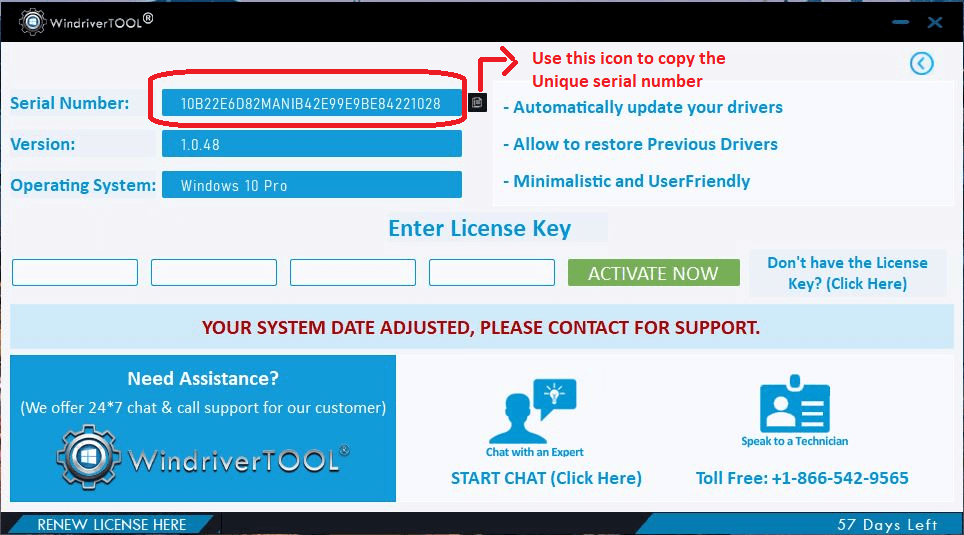
- Open your Windriver application on your computer system.
- After that, on the application pop-up, you have to click on the Renew Licence Here option.
- After that, on the next page, you can see the unique serial number of your product along with the application version and operating system version.
Frequently Asked Questions
-
How to uninstall the Windriver Tool on your computer system?
-
Can using the Windriver Tool affect the speed of my computer device?
No, the Windriver Tool does not affect your computer system in any way. It is an authentic performance booster application that enhances the power of your PC, be it by making its performance faster or helping you download suitable drivers for your device. So, using the Windriver application is going to make your computer device perform better.
-
How does the Windriver work?
The Windriver tool works by updating all the older versions of your computer driver to its latest version. The older drivers can slow down your computer system and can affect the overall performance of your device. Additionally, outdated drivers can lead to various other problems in your computer system that can harm your device. So, using the Windriver can help your PC in a well-working condition and perform tasks smoothly.
Windriver Tool’s Features

Device Management
Manage all your device’s software, drivers, and all the other aspects of your PC.

Task Management
See what tasks are being performed in the background, edit, manage and end them with ease.

App Management
App Management lets you manage the software and applications of your PC in one place.
1. Click the 'RENEW LICENSE HERE' button.
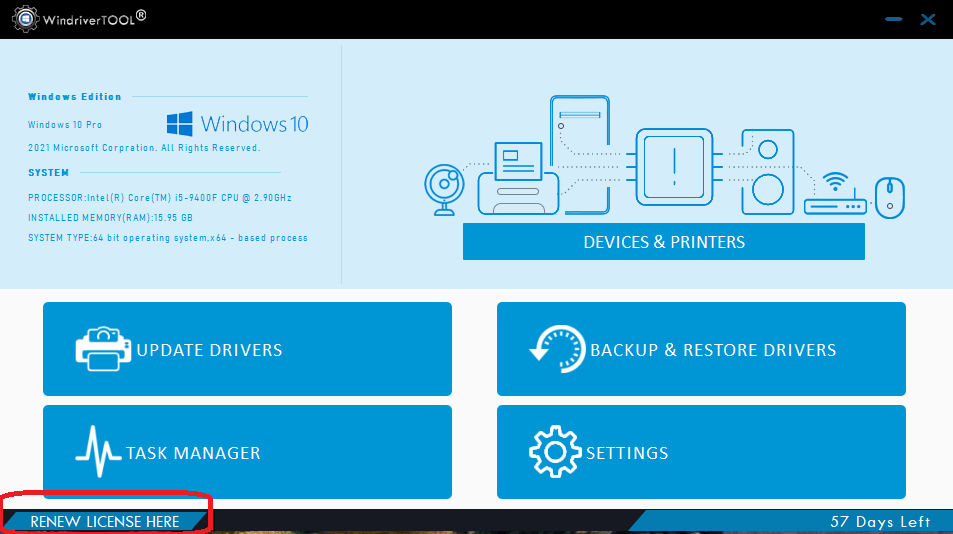
2. Then, click the Copy icon next to the Serial Number field to copy it.